If you’ve just opened AutoCount Accounting and encountered the following pop-up message:
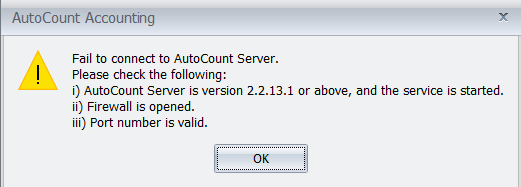
Fail to connect to AutoCount Server. Please check the following: i) AutoCount Server is version 2.2.13.1 or above, and the service is started. ii) Firewall is opened. iii) Port number is valid.
This can usually be resolved within a few minutes. The issue simply means that your AutoCount Accounting client, the program you use to log in cannot establish communication with the AutoCount Server component responsible for managing the database connection.
Below is a step-by-step guide to diagnosing and fixing it, in the same order the error message hints at.
Why This Error Happens
AutoCount Accounting uses a small background service called AutoCount Server (sometimes seen as an icon in your system tray/notification area) to handle communication between the client software and your database. The error appears when one of three things goes wrong:
- The AutoCount Server service isn’t running, or is an outdated version.
- Your firewall or antivirus is blocking the connection.
- The port number configured in AutoCount doesn’t match the port the server is actually using.
Let’s fix each one. Go through the steps in order — if Step 1 turns out to be the problem and starting the service fixes it, you can stop there and skip Steps 2 and 3.
Step 1: Check the AutoCount Server Service Is Running
- On the computer that hosts your AutoCount database (the server machine), check the system tray at the bottom-right of your screen.
- Look for the AutoCount Server folder icon. If it is red, the service is not running.
- Right-click the icon > Start Service. The icon should turn green once started.
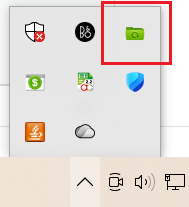
If you cannot find the icon, proceed to the next step.
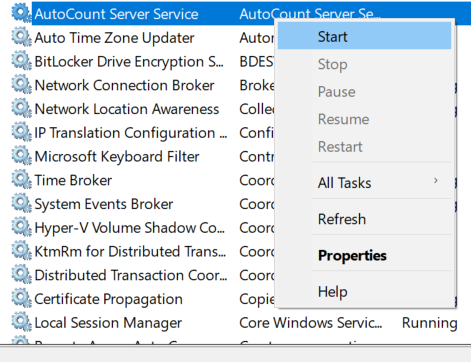
- Press Win + R, type
services.msc, and press Enter. - Scroll for AutoCount Server Service in the list.
- Right-click it and select Start. If it’s already running, try Restart instead.
- If the service doesn’t appear in the list at all, AutoCount Server isn’t installed on this machine (or was removed) — you’ll need to reinstall it.
Step 2: Open the Firewall Port
Even if the service is running, Windows Firewall (or your antivirus) may be silently blocking the connection.
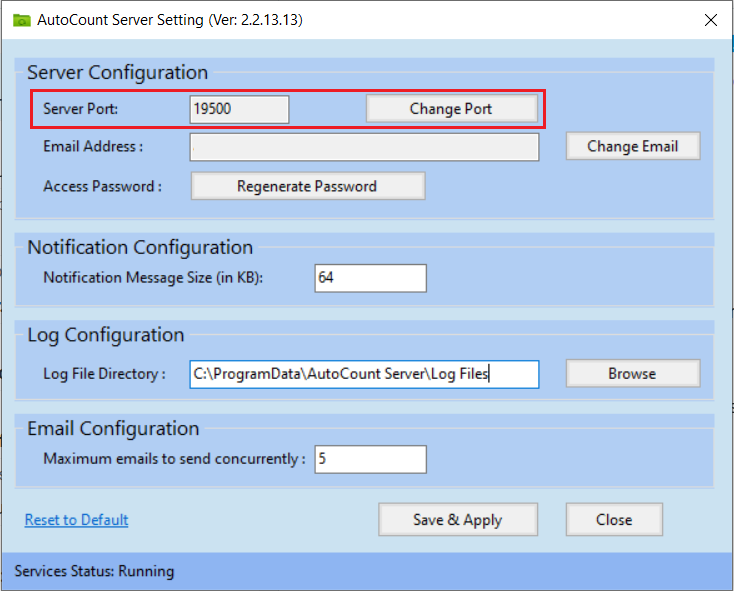
- Right-click the AutoCount Server icon and select AutoCount Server Setting to check the Server Port number (the default is usually 19500).
- Go to Windows Firewall > Advanced Settings > Inbound Rules.
- Click New Rule > select Port > Next.
- Enter the AutoCount Server port number (e.g. 19500) under Specific local ports > Next.
- Select Allow the connection > Next.
- Make sure Domain, Private, and Public are all ticked > Next.
- Give the rule a name (e.g. “AutoCount Server”) and click Finish.
If you use a third-party antivirus (Norton, McAfee, etc.), it may override Windows Firewall — you’ll need to add the same exception inside that antivirus program, or ask your IT support to do so.
Step 3: Make Sure the Port Number Is Valid
Sometimes the port AutoCount is trying to use is already occupied by another program, which stops the AutoCount Server service from starting properly.
- Check whether another program is already using the same port (e.g. 19500).
- If there’s a conflict
- Change the AutoCount Server port to a free port in AutoCount Server Setting
- Update the port in AutoCount Accounting under Tools > Options > General > Miscellaneous to match.
Both the server and every client PC must use the same port number for the connection to succeed.
One more thing to note: on some computers, especially older or lower-spec machines, this error can also happen simply because the PC is still busy loading other programs right after Windows starts up, the AutoCount Server service hasn’t fully started yet when you try to open AutoCount Accounting too quickly. If this sounds familiar, try waiting 1–2 minutes after Windows startup before launching AutoCount Accounting, to give the service time to finish initializing.